ConfigMgr: How to Change the CCMCache Size Using PowerShell
If you would like to deploy a CCMCache size change to computers using ConfigMgr and PowerShell then you will want to read this step-by-step guide..…
2019 Update
Ooohhh…. did I really do it this way?
- How do we know that the cache size has actually taken place?
- We don’t need to write to the registry do we? I mean, DO WE! No..you’re right - we don’t.
OK, yeah, I mean the method described below will work and get you out of a bind but there’s just gotta be a better way right? RIGHT?
For those of you that still want to use my original, “get you out of a bind” method, then read on!
I recently needed to change the CCMCache size on a few hundred computers and this was my approach to doing it via an SCCM application deployment using a PowerShell script to make the cache size change.
This post may seem daunting, but I can assure you that you do not need to understand PowerShell if you follow this guide. Take the time to read it slowly in the order presented and you will have it licked in no time.
As usual, let’s do this step-by-step:
1 - Pre-req’s:
The first thing I did was write a Powershell script to do the task in hand. When calling the script from the command line, you can use the parameter -CacheSize followed by the number in MB that you want to size it to. If you leave this parameter out then it defaults to setting it to 10GB. By including this parameter in the script we now give ourselves the ability of using one application with multiple deployment types – awesome! The script will also write to the local computers registry which I use not only for the detection rule but also it’s nice to be able to pull this information into a report if needed at a later stage.
Having said all of that, you can find the script here in my Github repo, it’s called: SetCCMCacheSize.ps1
If you wish to change the default setting of 10GB – then you will need to adjust the figure (in MB) on line 4 that reads:
$CacheSize = 10240
Remember, this is just the default cache size setting - we will be changing this dynamically in our SCCM application that we are about to create. This will become clearer as you continue to read through this post.
And finally, you may wish to adjust where it writes the information into the registry by editing line: 49:
New-Item -Path HKLM:\System\CSU\CCMCache -force
and line 52:
New-ItemProperty -path HKLM:\System\CSU\CCMCache -name 'SizeInMB' -Value $Size -PropertyType string -force
Once that’s done, simply save the .ps1 file to where ever you would normally store your apps\scripts source files that you distribute, on your Configuration Manager server.
2 – Now to create the Application:
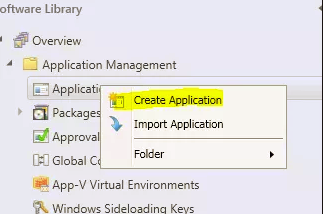
a: In the Configuration Manager Console, select Create Application as you would normally:
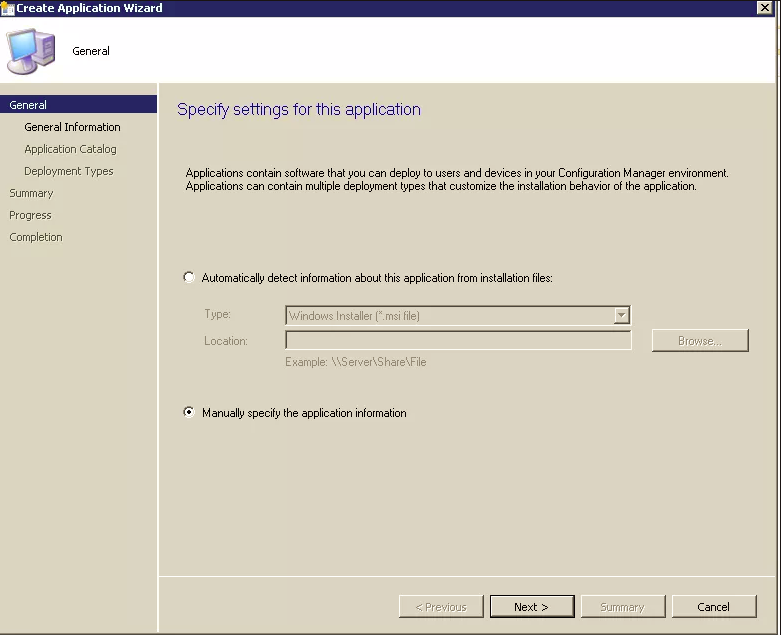
b: Select ‘Manually specify the information’:
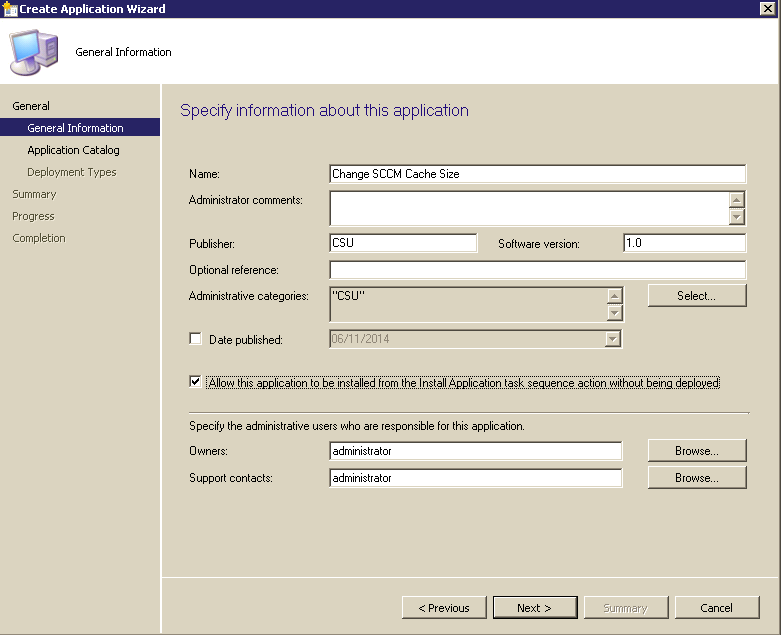
c: Complete the fields you are interested in on the General Information screen:
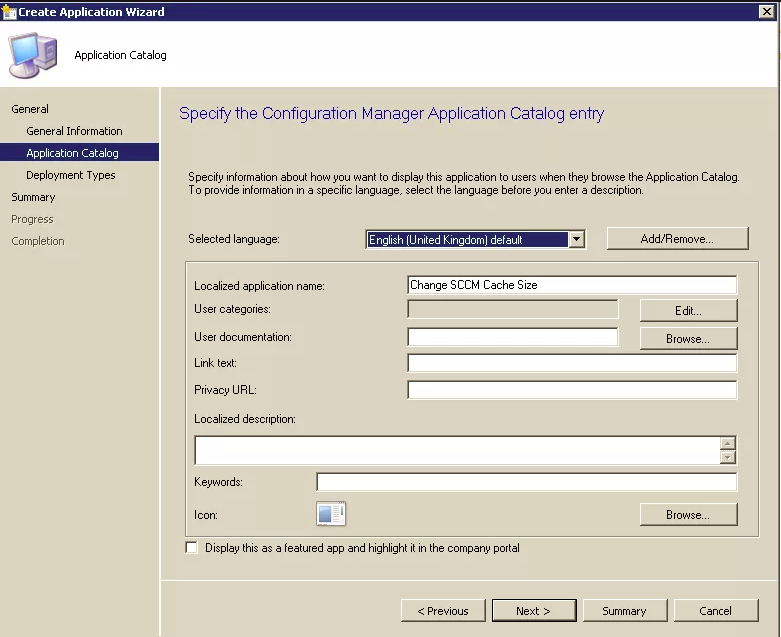
d: I never completed anything for the Application Catalog as I will be deploying this to devices, however, feel free to season to taste:
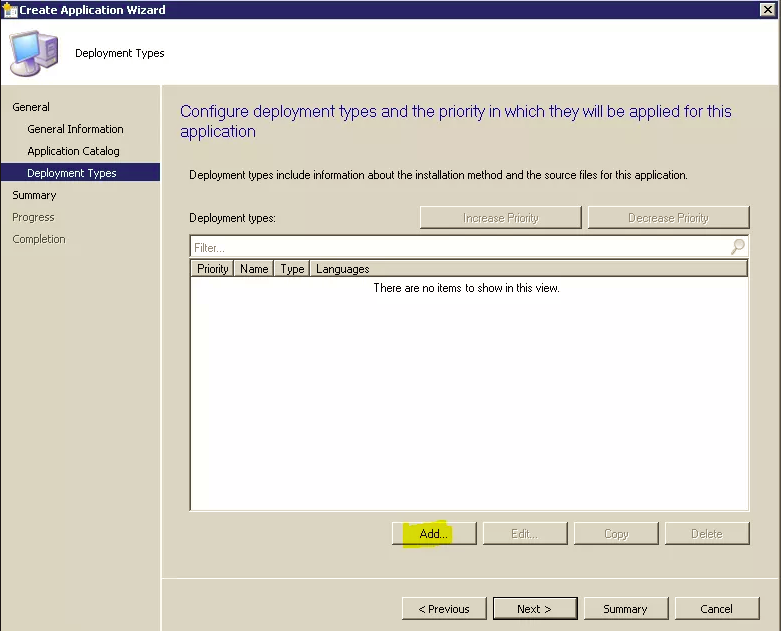
e: Click the ‘Add’ button to add a new deployment type:
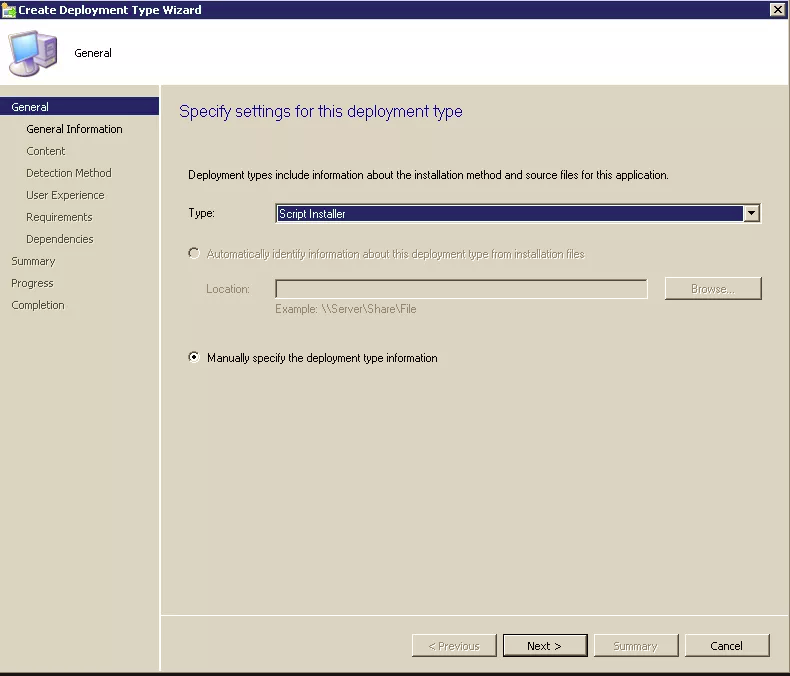
f: Select ‘Script Installer’ and ‘Manually specify the deployment type information’:
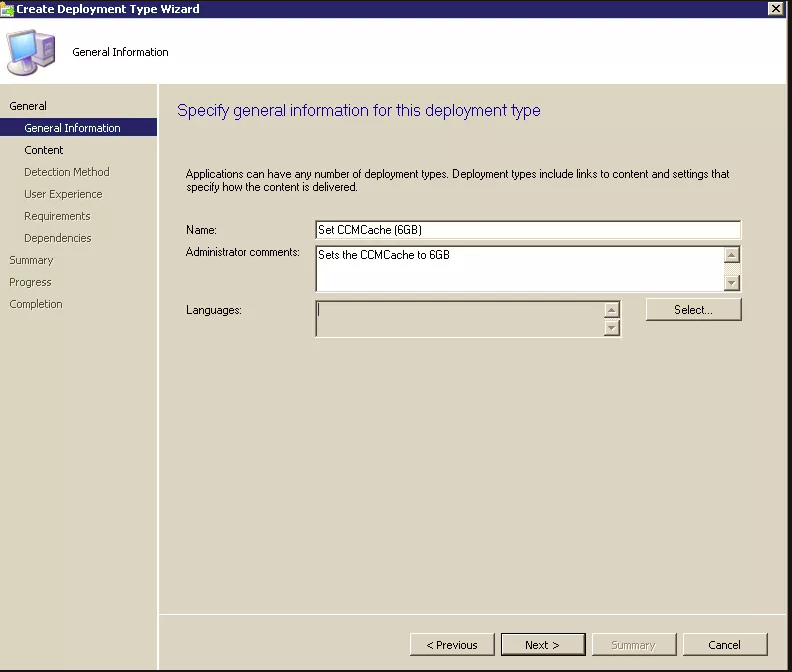
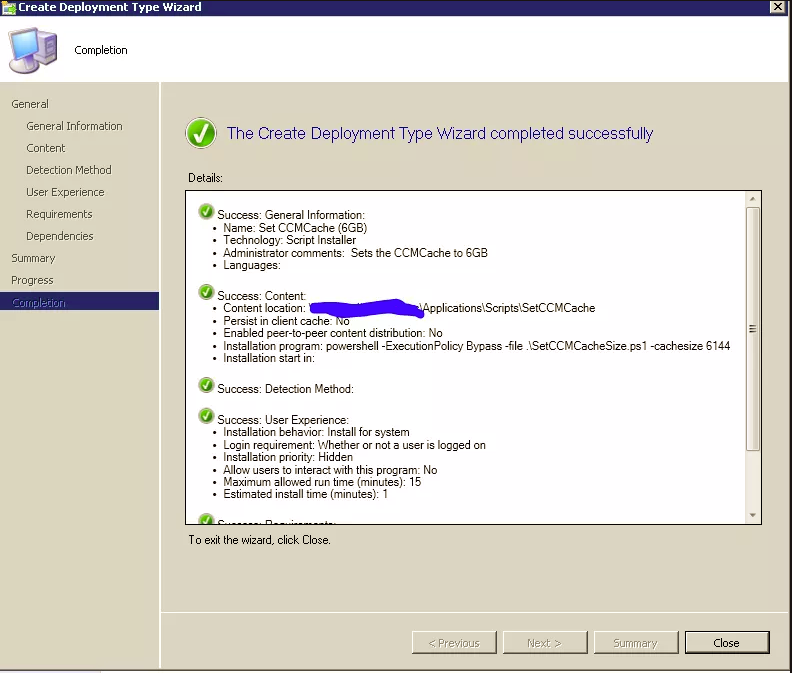
g: Give the deployment type a meaningful name. *In my example, I will be setting the cache size to 6GB:
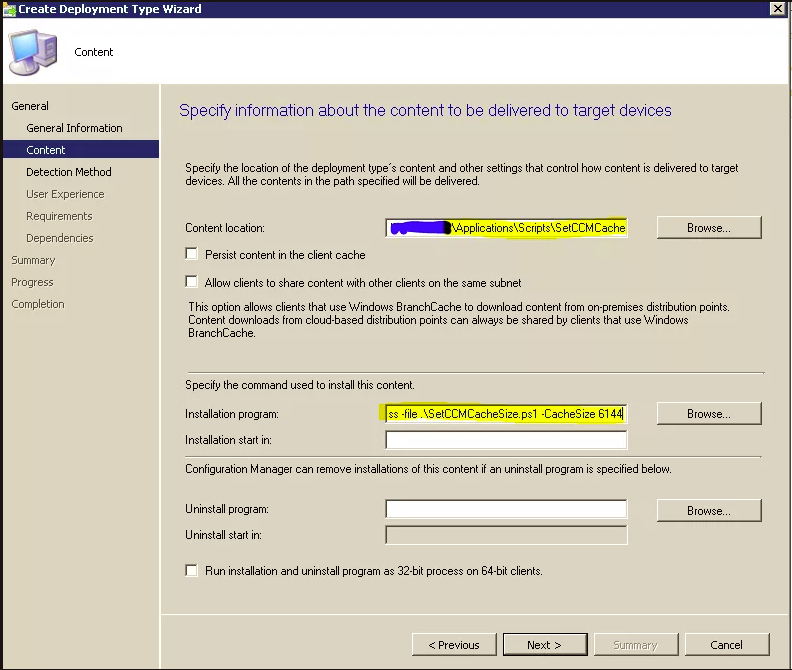
h: In the content Location field, Browse to the folder where you stored your powershell script and for the installation program type:
powershell -ExecutionPolicy Bypass -file .\SetCCMCacheSize.ps1 -cachesize 6144
If you want it set to 10GB then you can leave off the parameter -cachesize 6144 entirely. Likewise if you wanted it set the cache size to a different figure, say 8GB then you would use the following:
powershell -ExecutionPolicy Bypass -file .\SetCCMCacheSize.ps1 -cachesize 8192
1024 = 1GB so you need to use multiples of this number for the CacheSize parameter value.
Example, if you wanted a 2 GB cache size, then the number you would use is 2048 (1024 x 2 = 2048)
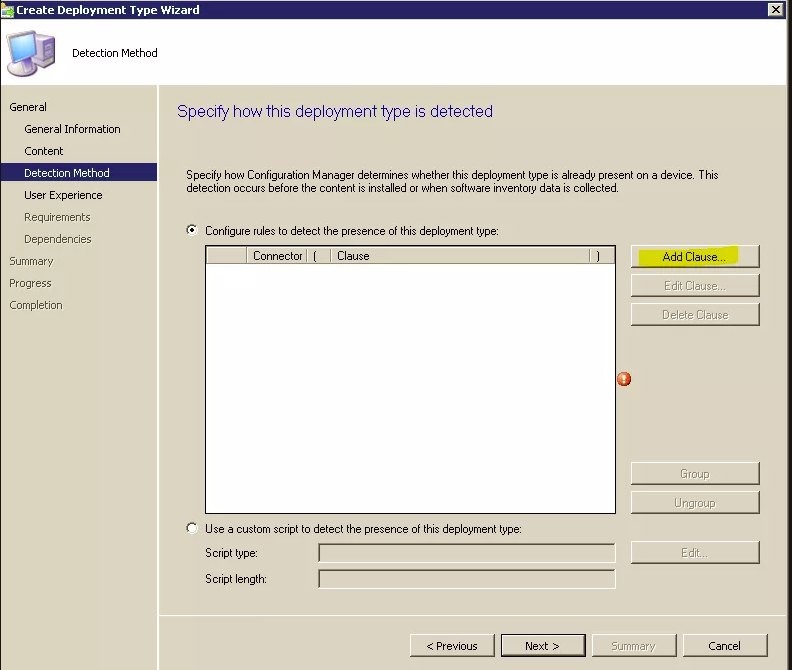
i: Click the ‘Add Clause’ button:
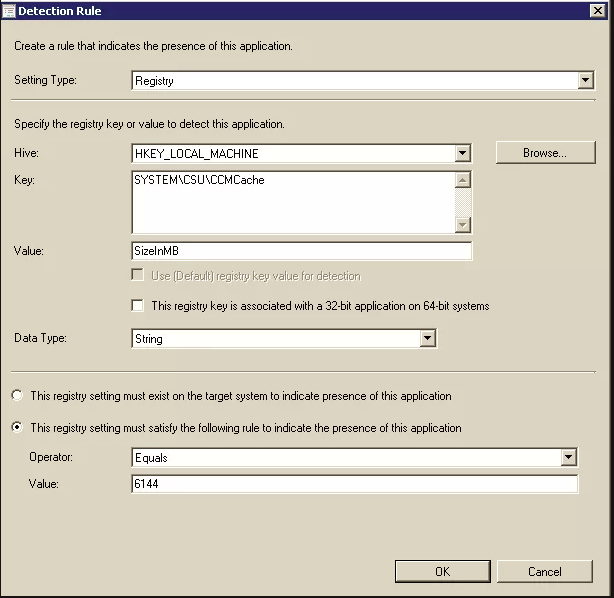
j: For the detection rule, complete the settings as shown in my screenshot below, however, if you have changed the script to write to a different part of the registry then you will need to reflect that change here. Also, make sure that the ‘Value’ is set to the same figure that you use as the parameter in step h (above) eg it must match the size that you are setting the cache to. Continuing my example, I am setting it to 6GB so the value is: 6144
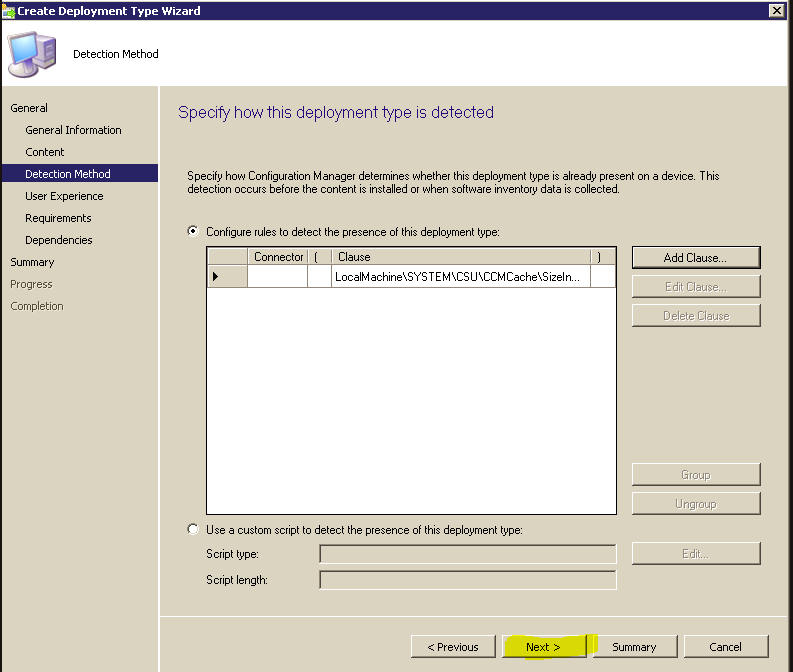
k: Here’s the result of your detection rule:
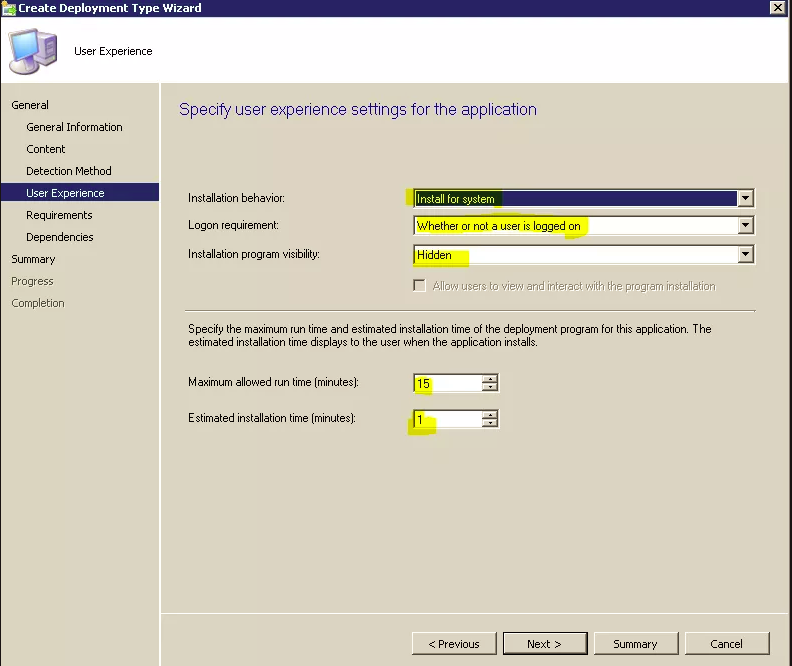
l: For the user experience, I will be deploying to devices and so I have completed the fields as shown below in my screenshot:
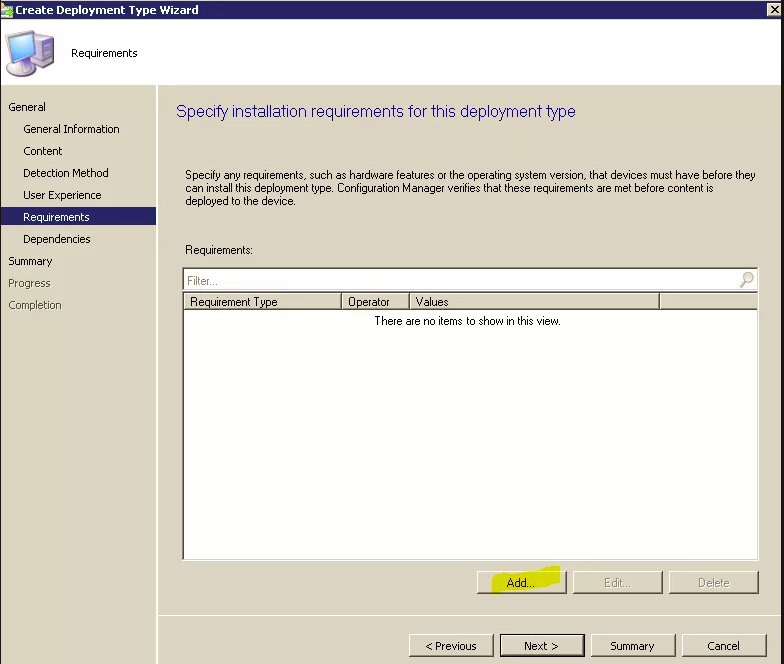
m: Click the ‘Add’ button to add some system requirements for this deployment type.
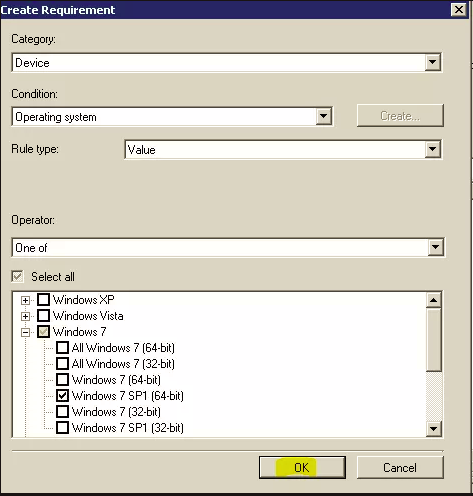
n: I just chose Windows 7 SP1 x64 but your needs may differ:
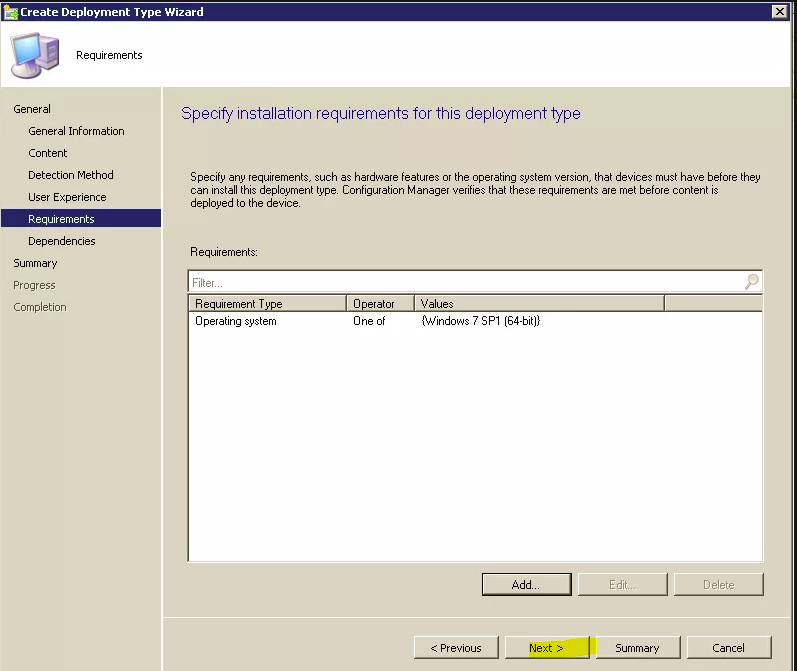
o: The result of your requirements:
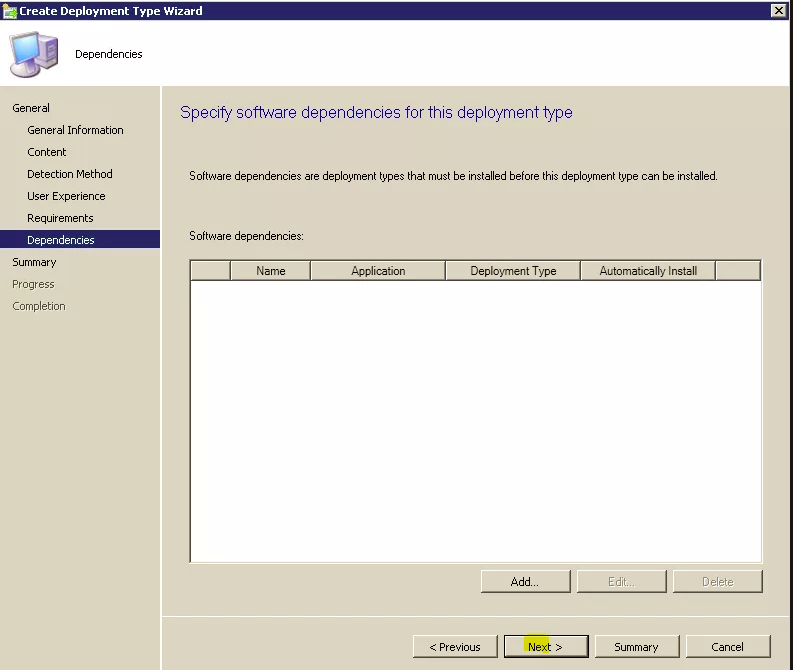
p: If you want to add any dependencies then do it here. I chose not to:
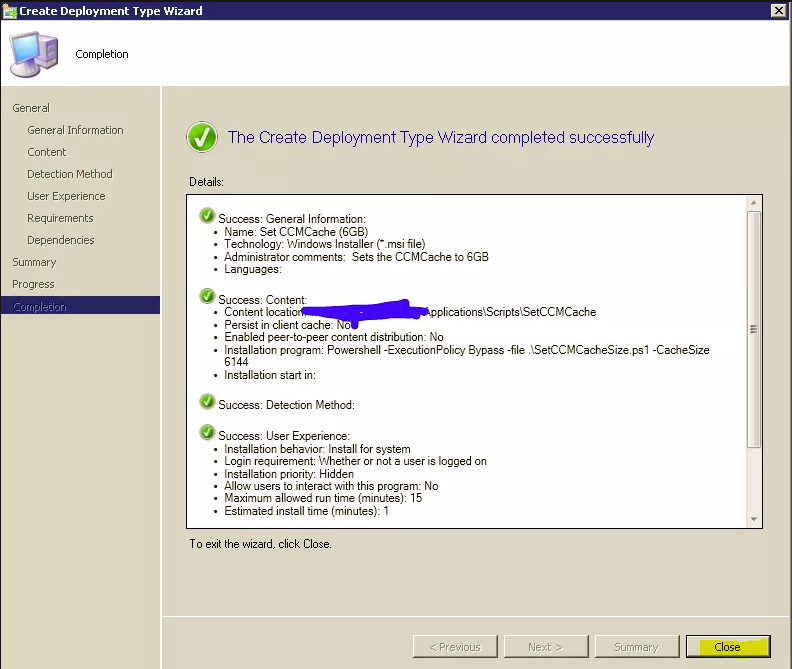
q: Close the summary screen:
r: The Deployment Type Wizard summary:
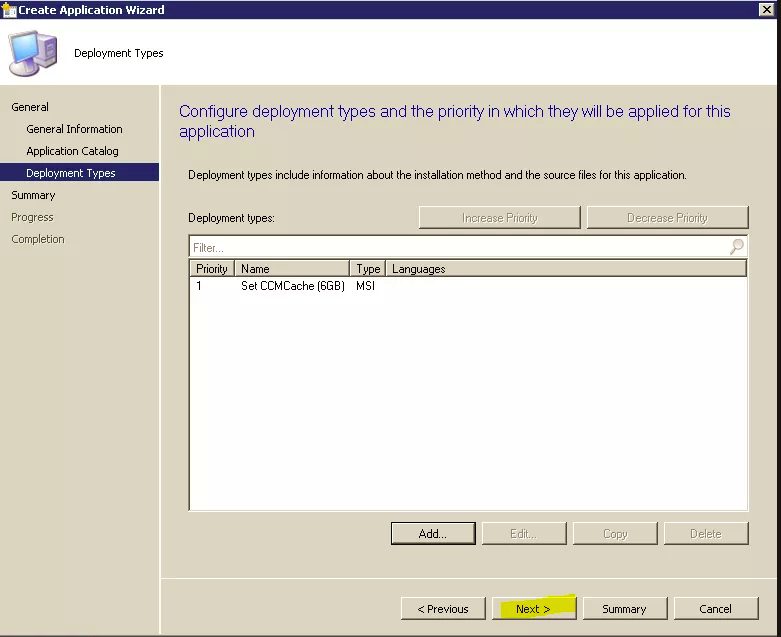
s: Here’s where you can add another deployment type. You could click the ‘Add’ button if you wanted to and repeat the above process and have multiple different cache sizes depending on the requirements. Cool stuff! I simply clicked ‘Next’ here for this example though:
t: You are presented with a Summary:
u: And you’re done!
3. Here’s what it looks like in Config Manager:
Now you simply need to upload this to your distribution point and deploy to a computer collection. I made mine a required deployment.
4. Here’s what you get in the registry on the computer that has successfully had its cache size changed:
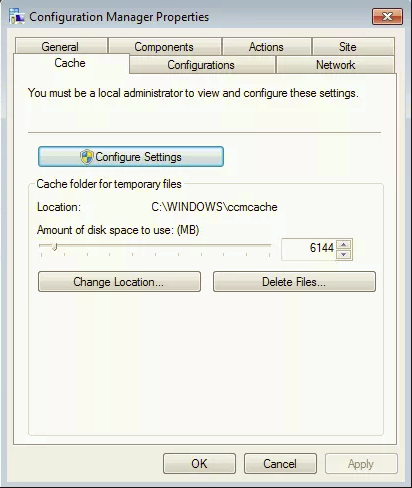
5. And the resulting cache size on the computer:
Get my books:
ConfigMgr - An Administrator’s Guide to Deploying Applications using PowerShell
“Understanding Microsoft Intune: Deploying Applications Using PowerShell” is available for purchase at all good book stores and online outlets. Don’t miss out on the opportunity to take your application deployment skills to the next level. Get your copy today!

